Background
As a method for closing cutaneous wounds, the technique of suturing is thousands of years old. Although suture materials and aspects of the technique have changed, the primary goals remain the same, as follows:
-
Closing dead space
-
Supporting and strengthening wounds until healing increases their tensile strength
-
Approximating skin edges for an aesthetically pleasing and functional result
-
Minimizing the risks of bleeding and infection
The postoperative appearance of a beautifully designed closure or flap can be compromised if an incorrect suture technique is chosen or if the execution is poor. Conversely, meticulous suturing technique cannot fully compensate for improper surgical technique. Poor incision placement with respect to relaxed skin tension lines, excessive removal of tissue, or inadequate undermining may limit the surgeon’s options in wound closure and suture placement. Gentle handling of the tissue is also important to optimize wound healing.
The choice of suture technique depends on the following:
-
Type and anatomic location of the wound
-
Thickness of the skin
-
Degree of tension
-
Desired cosmetic result
Proper placement of sutures enhances the precise approximation of the wound edges, which helps minimize and redistribute skin tension. Wound eversion is essential to maximize the likelihood of good epidermal approximation. Eversion is desirable to minimize the risk of scar depression secondary to tissue contraction during healing. Usually, inversion is not desirable, and it probably does not decrease the risk of hypertrophic scarring in an individual with a propensity for hypertrophic scars.
The elimination of dead space, the restoration of natural anatomic contours, and the minimization of suture marks are also important to optimize the cosmetic and functional results.
In this article, the techniques of suture placement for various types of stitch are described, the rationale for choosing one suture technique over another is reviewed, and the advantages and disadvantages of each suture technique are discussed. Frequently, more than one suture technique is needed for optimal closure of a wound. After reading this article, the reader should have an understanding of how and why particular sutures are chosen and an appreciation of the basic methods of placing each type of suture. [1, 2]
Indications
Simple interrupted suture
Compared with running (continuous) sutures, interrupted sutures are easy to place, have greater tensile strength, and have less potential for causing wound edema and impaired cutaneous circulation. Interrupted sutures also allow the surgeon to make adjustments as needed to properly align wound edges as the wound is sutured. A 2019 study suggested that high-density suture spacing (approximately 5 mm apart) could improve early scar formation, but noted that placing sutures farther apart (approximately 10 mm) results in fewer puncture wounds, decreases tissue trauma, saves surgical time, and conserves suture material. [3]
Disadvantages of interrupted sutures include the length of time required for their placement and the greater risk of crosshatched marks (ie, train tracks) across the suture line. The risk of crosshatching can be minimized by removing sutures early to prevent the development of suture tracks.
Simple running suture
Running sutures are useful for long wounds in which wound tension has been minimized with properly placed deep sutures and in which approximation of the wound edges is good. This type of suture may also be used to secure a split- or full-thickness skin graft. Theoretically, less scarring occurs with running sutures than with interrupted sutures because fewer knots are made with simple running sutures; however, the number of needle insertions remains the same. Both basting sutures and tie-over bolsters have been used to help secure skin grafts. [4] In one study, no statistically significant differences in wound cosmesis or complications were noted between running cuticular sutures spaced 2 versus 5 mm apart, suggesting that the extra time involved in placing very closely spaced sutures may not be worthwhile, [5] although the personal preference of the surgeon ultimately dictates the distance he or she chooses to place between sutures.
Advantages of the simple running suture over simple interrupted sutures include quicker placement and more rapid reapproximation of wound edges. Disadvantages include possible crosshatching, the risk of dehiscence if the suture material ruptures, difficulty in making fine adjustments along the suture line, and puckering of the suture line when the stitches are placed in thin skin.
Running locked suture
Locked sutures have increased tensile strength; therefore, they are useful in wounds under moderate tension or in those requiring additional hemostasis because of oozing from the skin edges.
Running locked sutures have an increased risk of impairing the microcirculation surrounding the wound, and they can cause tissue strangulation if placed too tightly. Therefore, this type of suture should be used only in areas with good vascularization. In particular, the running locked suture may be useful on the scalp or in the postauricular sulcus, especially when additional hemostasis is needed.
Vertical mattress suture
A vertical mattress suture is especially useful in maximizing wound eversion, reducing dead space, and minimizing tension across the wound. One of the disadvantages of this suture is crosshatching. The risk of crosshatching is greater because of increased tension across the wound and the four entry and exit points of the stitch in the skin.
The recommended time for removal of this suture is 5-7 days (before formation of epithelial suture tracks is complete) to reduce the risk of scarring. If the suture must be left in place longer, bolsters may be placed between the suture and the skin to minimize contact. The use of bolsters minimizes strangulation of the tissues when the wound swells in response to postoperative edema. Placing each stitch precisely and taking symmetric bites is especially important with this suture.
Half-buried vertical mattress suture
The half-buried vertical mattress suture is used in cosmetically important areas such as the face.
Pulley suture
The pulley suture facilitates greater stretching of the wound edges and is used when additional wound closure strength is desired. It has been shown to dramatically reduce defect size, simplify reconstructive techniques, and enable reconstruction of significant skin cancer defects of the head and neck to be performed in the clinic setting rather than in an operating room. [6]
Far-near near-far modified vertical mattress suture
The far-near near-far modification of the vertical mattress suture, which basically functions as a pulley suture, is useful when tissue expansion is desired, and it may be used intraoperatively for this purpose. This suture is also useful when one is beginning the closure of a wound that is under significant tension. Placing pulley stitches first allows the wound edges to be approximated, thereby facilitating the placement of buried sutures.
When wound closure is complete, the pulley stitches may be either left in place or removed if wound tension has been adequately distributed after placement of the buried and surface sutures.
Horizontal mattress suture
The horizontal mattress suture is useful for wounds under high tension because it provides strength and wound eversion. This suture may also be used as a stay stitch for temporary approximation of wound edges, allowing placement of simple interrupted or subcuticular stitches. The temporary stitches are removed after the tension is evenly distributed across the wound.
Horizontal mattress sutures may be left in place for a few days if wound tension persists after placement of the remaining stitches. In areas of extremely high tension at risk for dehiscence, horizontal mattress sutures may be left in place even after removal of the superficial skin sutures. However, they have a high risk of producing suture marks if left in place for longer than 7 days.
Horizontal mattress sutures may be placed before a proposed excision as a skin expansion technique to reduce tension. Improved eversion may be achieved with this stitch in wounds without significant tension by using small bites and a fine suture.
In addition to the risk of suture marks, horizontal sutures have a high risk of tissue strangulation and wound edge necrosis if tied too tightly. Taking generous bites, using bolsters, and cinching the suture only as tightly as necessary to approximate the wound edges may decrease the risk, as does removing the sutures as early as possible. Placing sutures at a greater distance from the wound edge facilitates their removal.
Half-buried horizontal suture
The half-buried horizontal suture (also referred as the tip stitch or three-point corner stitch) is used primarily to position the corners and tips of flaps and to perform M-plasties and V-Y closures. The corner stitch may provide increased blood flow to flap tips, lowering the risk of necrosis and improving aesthetic outcomes. [7] However, in larger flaps with greater tension, this technique has been reported to position the flap tip deeper than the surrounding tissue, often resulting in a depressed scar. [8, 9]
Absorbable buried suture
Absorbable buried sutures are used as part of a layered closure in wounds under moderate-to-high tension. Buried sutures provide support to the wound and reduce tension on the wound edges, allowing better epidermal approximation of the wound. They are also used to eliminate dead space, or they are used as anchor sutures to fix the overlying tissue to the underlying structures. Wounds under significant tension may benefit from the use of a subcutaneous inverted cross-mattress stitch (SICM stitch), which can approximate such wounds relatively easily via a lateral pulley effect. [10, 11]
Dermal-subdermal suture
A buried dermal-subdermal suture maximizes wound eversion. It is placed so that the suture is more superficial away from the wound edge.
Buried horizontal mattress suture
The buried horizontal mattress suture is used to eliminate dead space, reduce the size of a defect, or reduce tension across wounds. [12]
Running horizontal mattress suture
The running horizontal mattress suture is used for skin eversion. It is useful in areas with a high tendency for inversion, such as the neck. It can also be useful for reducing the spread of facial scars. If the sutures are tied too tightly, tissue strangulation is a risk. Although it is slightly more time-consuming to place, this suture appears to result in smoother and flatter scars than a simple running suture. [13] A modification of the horizontal running suture with intermittent single loops was recently reported to avoid the characteristic track marks resulting from suture tension while increasing wound eversion. [14] Other modifications include the V-shaped Victory stitch. [15]
Running subcuticular suture
The running subcuticular suture is valuable in areas where tension is minimal, dead space has been eliminated, and the best possible cosmetic result is desired. [16] Because the epidermis is penetrated only at the beginning and end of the suture line, the subcuticular suture effectively eliminates the risk of crosshatching.
The suture does not provide significant wound strength, though it does precisely approximate the wound edges. Therefore, the running subcuticular suture is best reserved for wounds in which the tension has been eliminated with deep sutures, and the wound edges are of approximately equal thicknesses.
Running subcutaneous suture
The running subcutaneous suture is used to close the deep portion of surgical defects under moderate tension. It is used in place of buried dermal sutures in large wounds when a quick closure is desired. Disadvantages of running subcutaneous sutures include the risk of suture breakage and the formation of dead space beneath the skin surface. Modifications of this suture have been recently described, which reportedly allows for consistent eversion and excellent cosmetic results in challenging high-tension areas. [17, 18]
Running subcutaneous corset plication stitch
The corset plication technique is used in wounds wider than 4 cm that are under excess tension. It creates natural eversion and better wound edge approximation. This technique eases subsequent placement of intradermal sutures, in that wound diameter and tension are significantly reduced.
The strength of the suture relies on inclusion of the septations from the fascial layer beneath the subcutaneous tissue. If tissue ruptured postoperatively, tension would be distributed more broadly. Potential problems include suture breakage and wound distortion. [19]
Modified half-buried horizontal mattress suture
The modified corner stitch allows equal eversion of the flap tip edges and improved aesthetic outcomes. Although it may increase risk of necrosis if tied too tightly, a study by Bechara et al suggested that the incidence of flap tip necrosis was comparable with that of the traditional corner stitch. [9] Modified subcutaneous buried horizontal mattress sutures relieve more wound tension and have a lower risk of dehiscence compared with vertical buried mattress sutures. [20]
Deep tip stitch
The deep tip stitch is used for M-plasty, W-plasty flaps, and V-Y closures to increase wound eversion. It provides longer-term support to the flap than the traditional corner stitch does and improves alignment of the tip with the sides of closure. This technique also avoids surface sutures, decreasing the risk of track marks. Flap tip necrosis and complications were comparable to that of standard sutures. [8]
Technical Considerations
Best practices
Effective suturing technique depends on appropriate selection of sutures, surgical gloves, needles, and needle holders (see Equipment).
Suture selection
Much of the process surrounding suture selection depends on surgeon training and preference. A wide variety of suture materials are available for each surgical location and surgical requirement. Generally, the surgeon selects the smallest suture that adequately holds the healing wound edges. The tensile strength of the suture should never exceed the tensile strength of the tissue. As the wound heals, the relative loss of suture strength over time should be slower than the gain of tissue tensile strength.
Certain general principles can be applied to suture selection. Sutures are no longer needed when a wound has reached maximum strength. Therefore, nonabsorbable suture should be considered in skin, fascia, and tendons (slowly healing tissues), whereas mucosal wounds (rapidly healing tissues) may be closed with absorbable sutures.
Aesthetic concerns are at a premium in regions of the head and neck such as the eyelid, periorbital area, nose, pinna, lip, and vermillion. In these areas, tensile strength requirements tend to be less, and smaller suture sizes are preferred. However, the mobility of the lip and vermillion requires a relatively higher suture tensile strength.
The activity and mobility of the face, anterior and posterior neck, scalp, superior trunk, and nasal and oral mucosa demand higher tensile strength requirements in suture selection. Additionally, major musculocutaneous flaps tend to be closed under significant tension, requiring maximal long-term tensile strength.
Because the presence of foreign bodies in contaminated tissues may facilitate infection, special consideration of suture selection in these locations (eg, a contaminated posttraumatic wound) is imperative. Multifilament sutures are more likely to harbor contaminants than monofilament sutures are; accordingly, monofilament sutures are generally preferable in potentially contaminated tissues. The smallest inert monofilament suture materials (eg, nylon or polypropylene) should be sued in this setting.
The optimal suture size is generally the smallest size that can still effectively achieve the desired tension-free closure. If wound tension is high, smaller-diameter sutures may actually injure tissues by cutting through them. Therefore, the tensile strength of the suture and that of the tissue should be closely matched.
Surgical glove selection
Surgeons who use sutures and needles should wear sterile surgical gloves without cornstarch, which has been shown to promote wound infection, cause serious peritoneal adhesions and granulomatous peritonitis, and act as a well-documented vector of the latex allergy epidemic. In 2008, 13 health professionals filed a citizen’s petition to the US Food and Drug Administration (FDA) to ban cornstarch powder on medical gloves. [21]
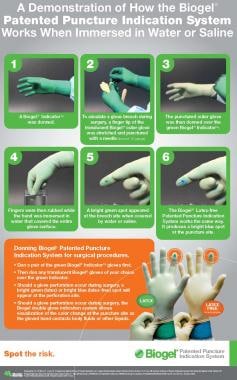
The FDA allows 1.5% of the surgical gloves to have holes, and these holes allow the transmission of blood and thus of potentially deadly bloodborne viral infections between patient and surgeon. After surgery has begun, a major cause of glove holes is surgical needle penetration through the glove. Consequently, the double-glove Biogel Puncture Indication System should be used to detect the location and presence of holes in the gloves, allowing the surgeon to change the gloves when a hole is detected (see the image below). [22]
Needle selection
No standardized sizing system or nomenclature is available for needles. The main consideration in needle selection is to minimize trauma. A taper-point needle is sufficient for tissues that are easy to penetrate. Cutting needles are typically reserved for tough tissues. As a general rule, taper-point needles may be used for all closures except skin sutures. The length, diameter, and curvature of the needle influence the surgeon’s ability to place a suture. Ideally, the needle-body diameter matches the suture size.
Needle-holderselection
No standardized sizing system or nomenclature is available for needle holders. Needle control and performance is affected by the stability of the needle within the needle holder; thus, for a secure needle hold and prevention of rocking, turning, and twisting, the jaws of the needle holder must be appropriate to the needle size. Often, the surface contact with the needle-holder jaws and the bending moment of the needle are maximized with an ovoid cross-section of the needle body.
In addition, the handle of the needle holder must be appropriate for the depth needed for the suture placement. A mechanical advantage for exerting force through the needle point is created by the difference between the length of the handle and the jaw.
The needle-holder clamping moment is a measure of the force applied to a suture needle by the needle holder, and the needle-yield moment is the amount of deformation that can occur before a needle is permanently deformed. Thus, when the needle-holder clamping moment is greater than the needle-yield moment, the needle is likely to be permanently deformed, which may lead to complications.
Outcomes
A study by Lin et al found the handling characteristics of Polysorb sutures to be superior to those of polyglactin 910 (Vicryl) sutures. [23] With comparable knot construction and suture sizes, the knot-breaking strength of Polysorb sutures was significantly greater than that of polyglactin 910 sutures. In addition, the mean maximum knot rundown force noted with Polysorb sutures was significantly lower than that noted with polyglactin 910 sutures, facilitating knot construction.
Drake et al used a miniature swine model to study the determinants of suture extrusion after subcuticular closure by synthetic braided absorbable sutures in dermal skin wounds. [24] Standard, full-thickness skin incisions were made on each leg and abdomen. The wounds were closed with either Polysorb or polyglactin 910 sutures.
Each of the skin incisions was closed with five interrupted subcuticular vertical, loops secured with a surgeon’s knot. [24] The loops were secured with three-throw knots in one pig, four-throw knots in the second pig, and five-throw knots in the third pig. Suture extrusion, wound dehiscence, stitch abscess, and granuloma formation were all observed.
The cumulative incidence of suture extrusion over 5 weeks ranged from 10% to 33%. Polyglactin 910 sutures had a higher cumulative incidence of suture extrusion than Polysorb sutures did (31% vs 19%). [24] With Polysorb sutures, the five-throw surgeon’s knot had a higher cumulative incidence of suture extrusion than the three-throw or four-throw surgeon’s knot (30% vs 17% and 10%, respectively).
When Sanz et al randomly assigned 210 rats into one of five study groups to compare polytrimethylene carbonate (Maxon) with three absorbable sutures (polyglactin 910, chromic catgut, and polydioxanone [PDS II]) with respect to tissue inflammatory reaction, knot security, suture tensile strength, and suture absorption, Maxon and PDS II elicited a lower degree of chronic inflammation than polyglactin 910 and chromic catgut did. [25]
In addition, the tensile strengths of Maxon and polyglactin 910 significantly exceeded those of PDS II and chromic catgut during the critical period of wound healing. [25] Maxon and PDS II retained a larger percentage of tensile strength during the long postoperative period, whereas polyglactin 910 and chromic catgut were mostly absorbed. The investigators concluded that Maxon was an excellent addition to the armamentarium of the surgeon.
A randomized control study of the barbed suture (V-Loc) confirmed the unique performance of this suture for gastrointestinal (GI) wound closure. [26] The V-Loc wound closure device appeared to offer GI closure comparable to that achieved with 3-0 Maxon while being significantly faster. However, further studies with V-Loc are required to evaluate its use in laparoscopic surgery.
When Pineros-Fernandez et al compared the biomechanical performance of polyglytone 621 (Caprosyn) suture with that of chromic gut suture, both suture types provided comparable resistance to wound disruption. [27] The biomechanical performance studies included quantitative measurements of wound security, strength loss, mass loss, potentiation of infection, tissue drag, knot security, and knot rundown, as well as suture stiffness.
Before implantation, suture loops of Caprosyn had significantly greater mean breaking strength than suture loops of chromic gut did [27] ; 3 weeks after implantation of these absorbable suture loops, the sutures had no appreciable strength. The rate loss of suture mass of these two sutures was similar.
As expected, chromic gut sutures potentiated significantly more infection than Caprosyn sutures did. [27] However, the handling properties of Caprosyn sutures were far superior to those of chromic gut sutures, and the smooth surface of the Caprosyn sutures encountered lower drag forces than the chromic gut sutures did. Furthermore, it was much easier to reposition the Caprosyn knotted sutures than the knotted chromic gut sutures. In the case of chromic gut sutures, it was not possible to reposition a two-throw granny knot.
These biomechanical performance studies demonstrated the superior performance of the synthetic Caprosyn sutures compared with chromic gut sutures and provided compelling evidence of why Caprosyn sutures are an excellent alternative to chromic gut sutures.
-
Diagram of a needle.
-
Needle is placed vertically and longitudinally perpendicular to needle holder.
-
Needle holder is held through loops between thumb and fourth finger, and index finger rests on fulcrum of instrument.
-
Needle holder is held in palm, allowing greater dexterity.
-
Knot tying.
-
Simple interrupted suture placement. Bottom right image shows a flask-shaped stitch, which maximizes eversion.
-
Line of interrupted sutures.
-
Running suture line.
-
Running locked suture.
-
Vertical mattress suture.
-
Pulley stitch, type 1.
-
Far-near near-far modification of vertical mattress suture, creating pulley effect.
-
Horizontal mattress suture.
-
Half-buried horizontal suture (tip stitch, three-point corner stitch).
-
Subcuticular stitch. Skin surface remains intact along length of suture line.
-
Anatomy of needle.
-
Commonly used suture needles, with cross-sections of needles shown at point, body, and swage. (A) Taper-point needle. (B) Conventional cutting needle. (C) Reverse cutting needle.
-
Interaction between needle holder and suture needle. (A) Needle holder of appropriate size for needle. (B) Needle holder that is too large for needle—pressure applied by needle holder leads to inadvertent straightening of suture needle. (C) Needle holder that is too small for needle—needle rotates around long axis of needle holder.
-
Poster for Biogel Puncture Indication System.